This lesson is courtesy of Rod Webb. Rod is a veteran Watercolorist from New Zealand. You can learn more about Rod and view more of his work by following this link to reach his Website.
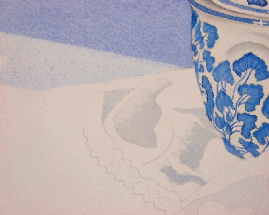
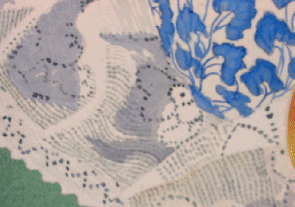
Shadows added to show folds in cloth and holes in lace painted at the back. Light grey with a touch of green used.Whoops, I just spotted a mistake. I painted the blue background right down to the cloth over the table top.
Soon corrected. I laid a plastic ruler along edge where table should be to protect the background wash. Then used a wet sponge to lift the paint, still left a slight stain but that will be covered with the green.
Both sides were sponged off.
Green table surface painted. Made darker at the back and lightened at front.
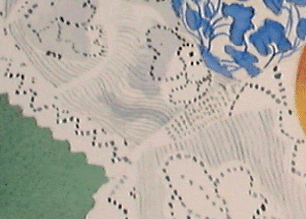
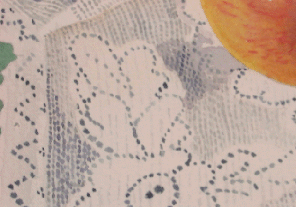
Holes in lace painted with the grey/green mix. Remaining graphite sketch lines erased with the putty rubber.
Lines following the folds and curves of the cloth painted in.
Dots added over lines for weave effect. Strength and pattern varied.
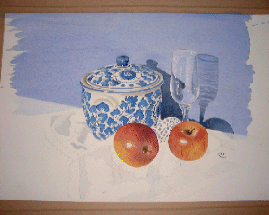
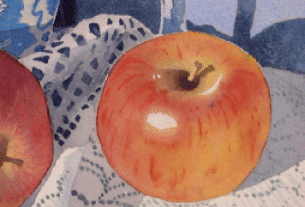
Stronger shadows placed around apples to anchor them down, up to now they appeared to be floating.
Shadows on rear folds strengthened, pale yellow added to front fold to bring out the middle fold.
Some dots were darkened in the weave, rear shadows touch of blue added, yellow shadow near apple and touch of red added to front shadow. There is only just a hint of each color, although it is difficult to see in the photo.
Decision time, is it finished?. I usually wait a few days and have another look before deciding.
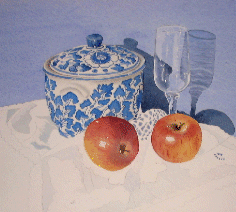
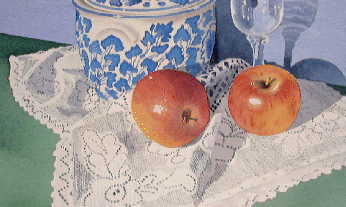
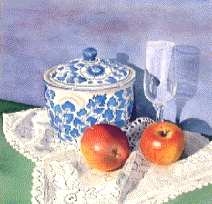
Placing a tempory matt around painting makes a lot of difference. Find a nice spot for you signature. Don’t know what color matt or frame I will use, any suggestions? :-)The image to the left shows what I considered to be my “final painting”. However, after showing this piece to several of my fellow artists, I discovered that there were a few things I could do to improve this painting.Want to see those changes? Good, then keep reading!
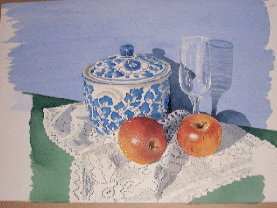
Added some color into the background to break up the solid blue.
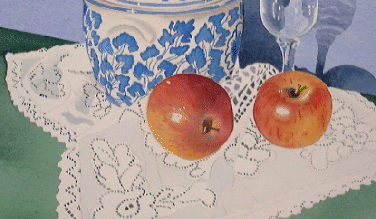
Left apple.Red shading was darkened.Reflected color from apples added to cloth.
Shadow underneath and behind apple darkened
Right apple.Reflected color added on cloth.Shadow darkened.Shadow added on right side of apple.
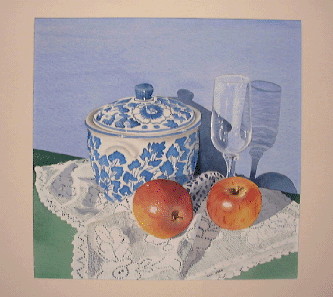
Helpful comments were implemented which has resulted in a better painting as shown in the before and after images above.If you can find a friend that will give you their honest criticism it is a great help, you may not always agree with all comments, but always listen.
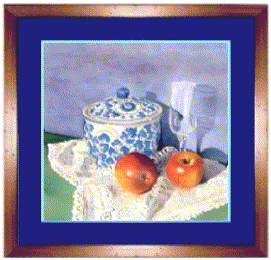
Don’t forget to photograph or scan your painting before framing. Always keep a copy of all paintings so you can look back on them if sold. To the left, my final painting is framed with a double matt, and ready to go!
“Don’t forget to photograph or scan your painting before framing. Always keep a copy of all paintings so you can look back on them if sold.” >> I like this advice. Each piece is a milestone for you which is something you don’t want to forget.


“Don’t forget to photograph or scan your painting before framing. Always keep a copy of all paintings so you can look back on them if sold.” >> I like this advice. Each piece is a milestone for you which is something you don’t want to forget.
Very well illustrated. Thanks for sharing!