<< Follow this link for part 1 of this still life painting lesson
Oil Painting demonstration of persimmons on a dish Part 2
In this section, I will show how to oil paint the final color layers and finishing layers of these persimmons. Hopefully, the oil painting techniques discussed will excite your enthusiasm as much as these persimmons excited my taste buds after the painting sessions ended!
Here we go!
[adinserter block=”26″]
Last time, we left you here, with the dead layer completed. One thing to notice here. No texture, only your main elements, a few details, and mostly shadow’s and modeling of the subjects.
Lets start our color layer with some contrasting blue for the background. This I feel will make the foreground persimmons want to POP off the page. A nice, but subtle artist trick for future reference! This site is full of little how to oil paint tricks and tips, so keep an eye out for them!
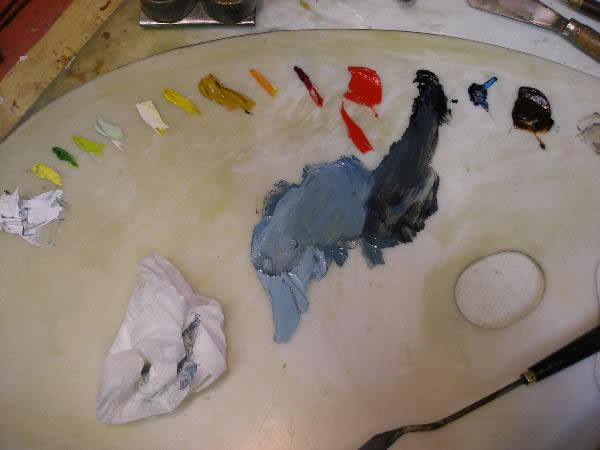
The blue’s are laid in very loosely with a small brush to keep control of where the color transitions take place.
Now, mixing the cad yellow light with a bit of cad medium red, we get our orange. I add also a bit of umber to darken it. Basically 2 colors!
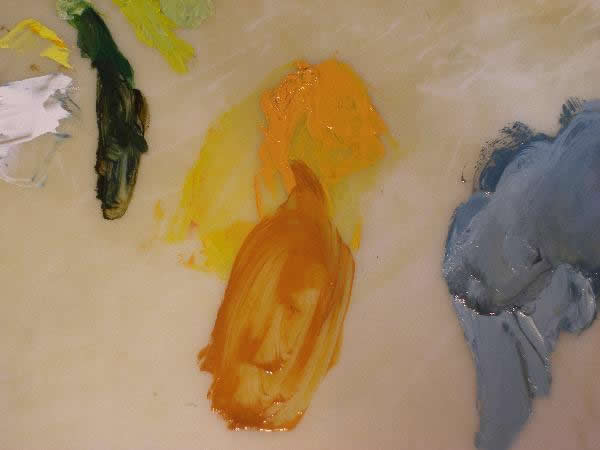
I also go ahead and lay in some green (cad light yellow & prussian blue) with more yellow than blue for a very light green, and start on a few leaves.
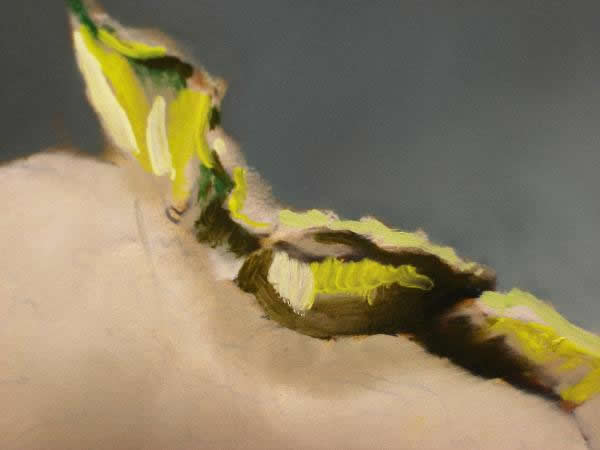

Using a small filbert brush, I begin blending and then follow up with the large mop brush.
Now between these two photo’s there seems to be a great deal of difference in the painting, but really, this took only a few minutes. What has transpired is this:
1. Colors are laid in throughout the entire painting, blocked in. Check out the fruit on the far right.
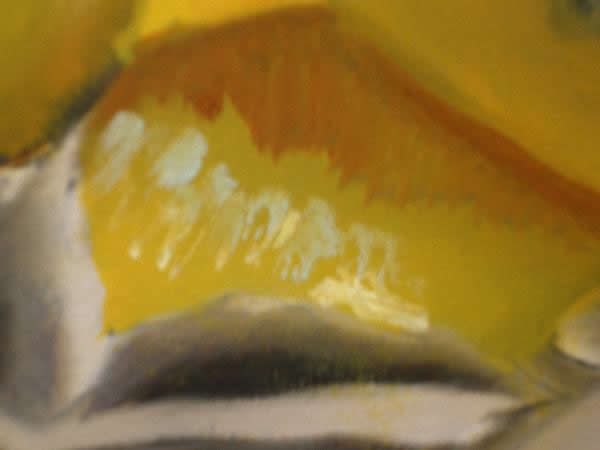
2. I’ve come in and added just a few highlights to the fruit. This was a simple gray/blue mix that represents the frosty film that covers each fruit in just a few places.
3. I’ve also added sunlight reflections on only three fruit. This was just a matter of a few strokes of white/yellow paint that was blended on its edges.

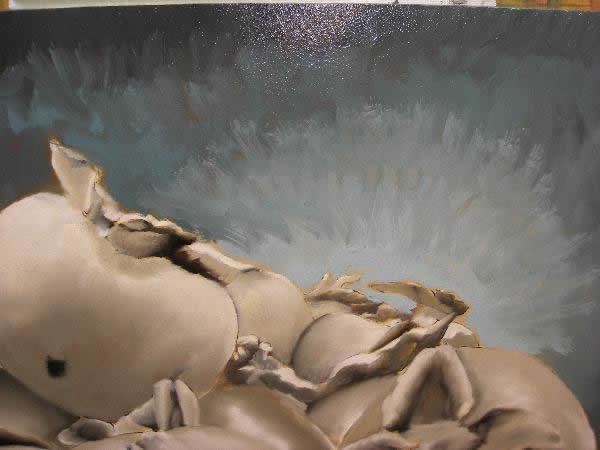
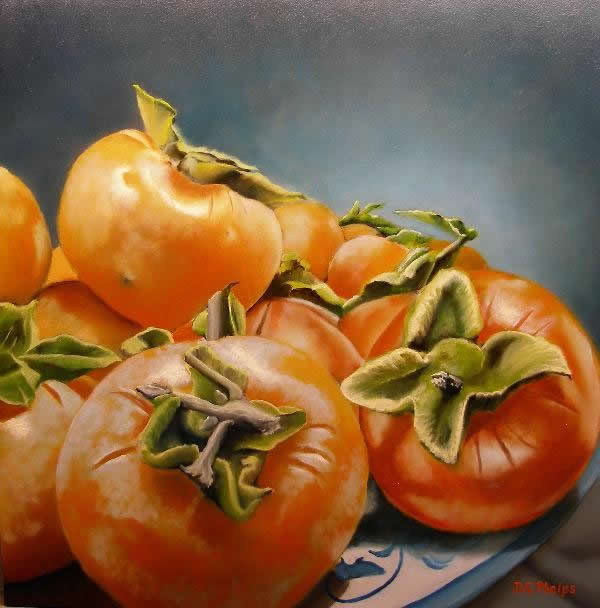
A closer view of the focal point. The gray blue dusting, the 2 highlights were done, wet-in-wet to the orange underneath. The fruits details (like the spot) and modeling really is coming from the gray layer underneath making this appear to have so many nuances, when in fact, it is only the two oranges, some gray/blue, and highlights!
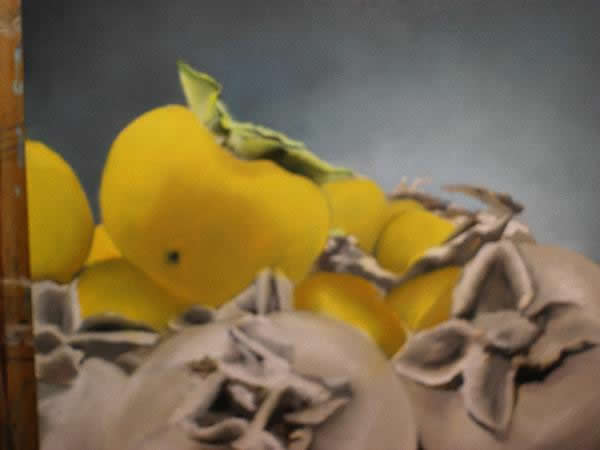
After an overnight of drying, the blue plate, details on the leaves, and the foreground fruit were more developed.
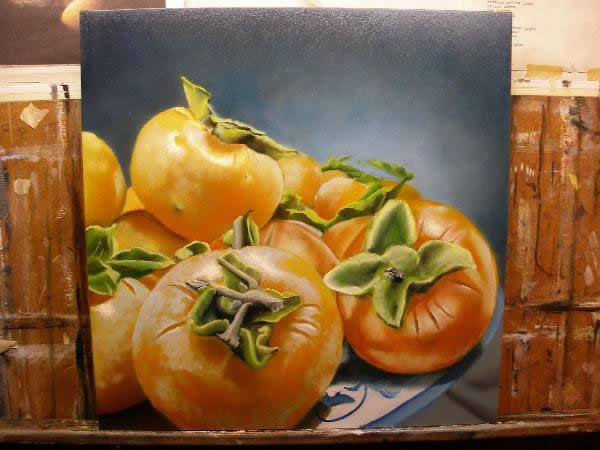
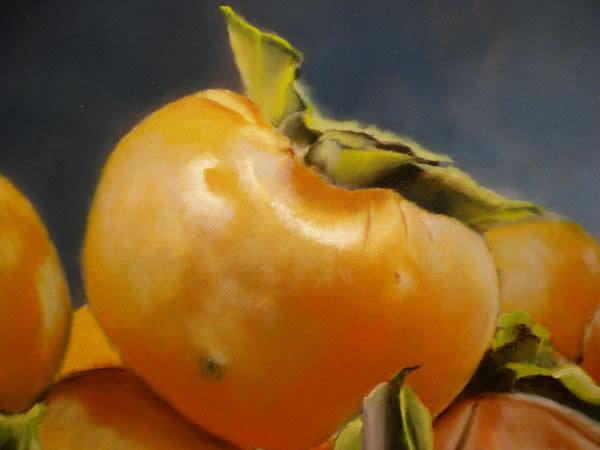
Here we see the completed painting with again more details developed in the leaf structure of the foreground fruit. An red/orange glaze was added to each fruit on the left side to deeper the color there. Additional white was added to all highlights to bump these up again and a signature.
I hope I’ve shown you how to oil paint a persimmon at this point, and also introduced you to a this wonderful flemish technique.
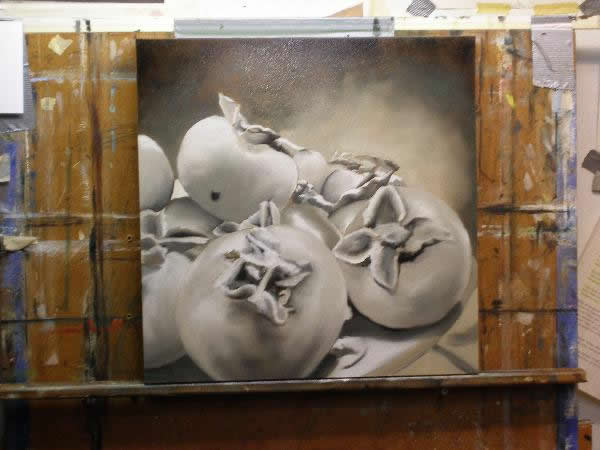
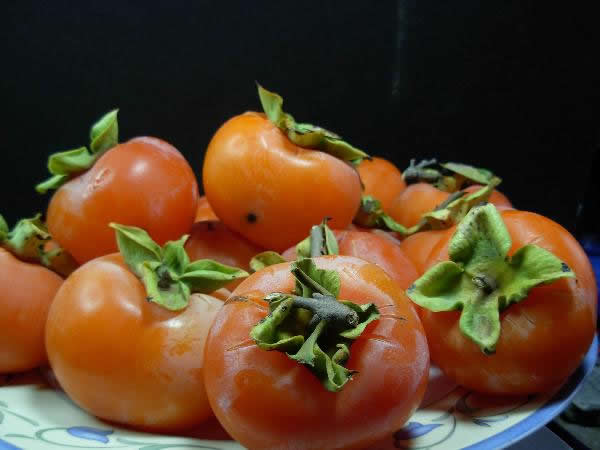
Our reference photo once again for comparisons. As you can see, some cropping of the original image took place, and the main difference is the addition of a blue background rather than the black.
The only other thing I would like to mention is the use of “Liquin” as a drying accelerator, which allowed me to complete this work in the 7 day time limit. Being a small painting helped in that regards too! ;)Till next time……
<< Follow this link for part 1 of this still life painting lesson
Highly Recommended Painting Course From Delmus Phelps!
A Real Art Lesson
Capture the joy of painting and creating things of beauty with your own gorgeous oil painting. An oil painting that you create following this step by step technique, and once learned, can be repeated over and over again so you’ll enjoy a lifetime of artistic freedom in creating many more masterpieces.
Here’s what you’ll DISCOVER within “A Real Art Lesson”
- You will learn all the technique needed to do any painting you would like.
- With over 140 pages of information and 225 photos you get a complete how-to manual.
- How you place your objects, lighting and composition.
- How to prepare the canvas step by step.
- How we transfer the drawing to the canvas.
- You will see up-close, the umber under-layer, and how it is done.
- The finished umber under-layer and all the steps to get you there!
- You will learn how to mix your paints.
- How to make the “dead layer” or Gray layer, and why.
- Closeups of brush strokes and how the paint is applied.
- All the details are taught to make your paintings stand out.
- And many more photo’s and explanations than what I can give you here.
Leave a Reply